
How to schedule announcements in SharePoint Online
Scheduled announcements appear on a SharePoint page on the day you choose and disappear on their own afterwards. This guide shows how to schedule them with Alerts Fusion, including open delays, auto close and per-person limits, so nobody has to remember to post and remove them.
The scheduling options in Alerts Fusion
- Date and time range
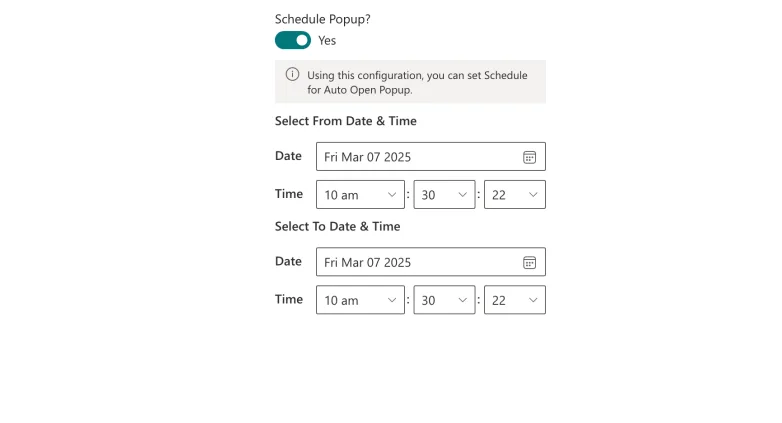
- Schedule Alert, Schedule Panel and Schedule Popup set the from and to date and time for automatic opening.
- Auto open and open delay
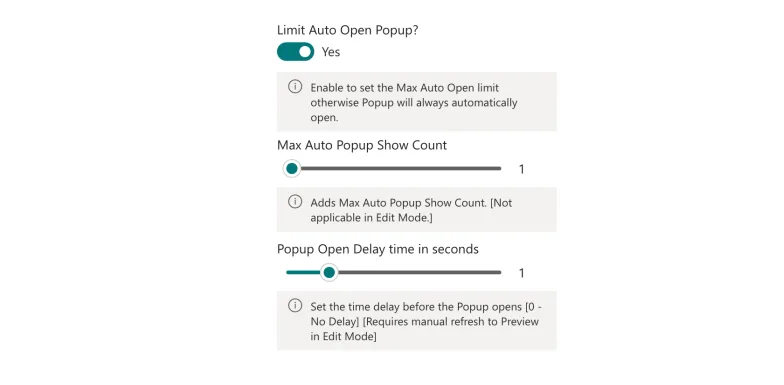
- Announcements can open on page load, optionally after a delay set with a slider.
- Auto close
- Close the announcement automatically after a number of seconds. Message bars can be dismissed automatically too.
- Maximum automatic shows
- Limit how many times each person sees the announcement automatically. After that, it opens only when they click the trigger.
- Dates from a SharePoint list
- When content comes from a SharePoint list, the schedule can follow the dates stored on the list item, so you do not set it by hand.
Schedule an announcement step by step
- Add Alerts Fusion to the page. Edit the modern SharePoint page and add the Alerts Fusion web part where the announcement belongs.
- Pick the format and content. Choose an alert, panel or popup (the types with date scheduling), then add the announcement as rich text, HTML, a page URL or SharePoint list content.
- Switch to automatic opening. Set the open event to Auto Open so the announcement appears on page load. Optionally hide the trigger and add an open delay.
- Set the date and time range. Turn on Schedule Alert, Schedule Panel or Schedule Popup and choose the from and to dates and times.
- Control how often people see it. Set the maximum automatic shows per person and an auto close time so the message does not become noise.
- Target and publish. Optionally limit the announcement to SharePoint groups or users, then republish the page.
Example schedules
| Announcement | Format | Schedule | Frequency |
|---|---|---|---|
| Town hall reminder | Alert with action button | From three days before until the start time | Up to 3 automatic shows per person |
| New policy to read | Popup with overlay | From launch day for two weeks | 1 automatic show, then on click |
| Open enrolment window | Panel | For the length of the window | Up to 5 automatic shows |
| Event list items | Popup from a SharePoint list | Taken from each list item's dates | Up to 2 automatic shows |
Good practice
- Use one automatic announcement per page so messages do not compete.
- Combine scheduling with audience targeting so each group only sees what applies to them.
- For notices like maintenance windows, a warning message bar is clearer than a popup.
- Check the schedule in the property pane before you republish the page.
Scheduling questions
Do scheduled announcements need someone to remove them?
No. Once the end of the date and time range passes, the announcement no longer opens automatically.
Can different people see different announcements?
Yes. Add an Alerts Fusion web part for each announcement and use audience targeting to choose SharePoint groups or users for each one.
Is this the same as the old SharePoint alerts?
No. Classic SharePoint Alerts were emails about list and library changes, and Microsoft retired them in SharePoint Online from July 2026. Alerts Fusion shows announcements on the page itself.
Try it on your own intranet. Alerts Fusion is free for 7 days on one site. Install it from Microsoft AppSource or book a free demo.